BMW R100RT: The Paint Job - Part I
Ricardo Perez
 |
| What Have I Done! |
Next came the front fender with the frame brace. The fender and brace came off easily, but the nuts that held the brace to the fender were flat blots on the underside of the fender and three of them would turn freely when I tried to remove the carriage nuts. My wife turned them with a 10mm wrench while I hung on to the 1/8th inch bolt lip with my channel grips and got them off. That two pieces off and making progress. I then removed the gas tank and flushed it out while I had it off the bike. It needed flushing.
 |
| Fairing sits on these two braces |
I next removed the headlight lens on the fairing. Its rubber gasket covers four screws that release the lens. Just turn the rubber corner down and insert your screw driver to release the lens. Remember its glass so it'll break. Set it aside somewhere safe. I then removed the front park light lens (the small narrow one over the headlight) and I reached in and unplugged the gauges on the dash. Once I had the headlight lens out and pulled out the boot surrounding the headlight housing. I mistakenly began to remove the pockets on the inside of the fairing only to find that there is one screw on the bottom which was impossible for me to get to so I abandoned that strategy and slowly started to remove the bolts on the front brace. It was a tight squeeze but eventually I was able to remove all four bolts and the ones on the back brace under the gas tank. The fairing still didn't slide off so I removed some of the screws holding the center piece to the two side pieces. I only removed some of the lower part of the fairing screws since the top part is held together by the dash which has rivets holding it to the fairing, but that was enough to allow the fairing to open a bit and up and around the front brace and in one up and forward movement it was off.
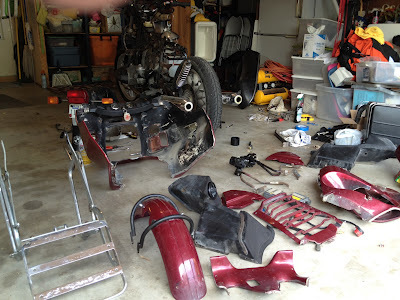 |
| Here's my bike with all parts to be painted |
So that was it for the tupperware. I decided to have it painted in black. We'll see how it looks. I removed the rear frame bracket to have it powder coated as well as the bracket for the fog lights. I'm making a list of things I need to replace. While everything is off I plan have a little mechanical work done on the bike. I need to replace the front fork seals, replace the seals on the push rods, redo the brakes, and check the points.
Now that I have it apart I hope to take pictures as I put everything back together again and I'll have a better description on how to remove and re-install the fairing.
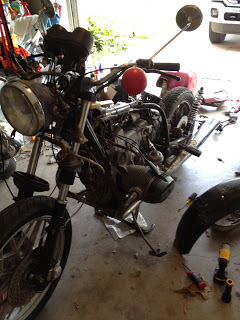 |
| Naked Bike! |